Lenovo Yoga 13 memory upgrade
Here are photo instructions for upgrading the RAM on a Lenovo Yoga 13.
Surprisingly, there are not any screws to be removed. Instead, the keyboard is secured via double-sided tape. You must pry up the rear edges of the keyboard and then slide the keyboard back and off, revealing the memory slot below.
Overall I personally do not like the solution Lenovo has chosen for securing the keyboard. It seems prone to eventual failure and I dislike taking the keyboard off repeatedly as I fear the tape will eventually lose its stickiness.
Regardless, here are the photos so you can judge for yourself what it is like to take off the keyboard and you can see where the single RAM slot is.
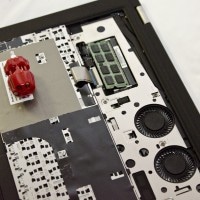
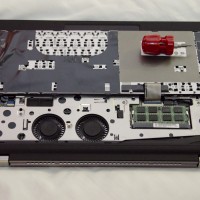
- Memory upgrade in place
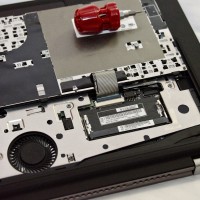
- Closeup of the RAM slot
- RAM in upright position after releasing the retaining tabs
- Here the keyboard is removed and laid flat (be careful with the ribbon cable that connects the keyboard to the machine!)
- Once released from the adhesive tape, gently slide the keyboard back and out (be careful with the ribbon cable underneath the keyboard!)
- The keyboard is secured with two pieces of double sided tape (one on each side) you may want to use a thin card to help keep the keyboard ‘up’
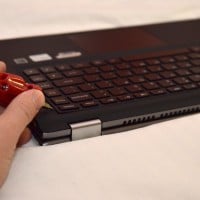
- Gently raise rear corners of the keyboard (careful not to scratch the keyboard or case)
- Fold the display behind to give full access to the keyboard
- Yoga 13 in ‘flat’ position
NOTE: I recommend watching these videos as well:
I did not take the videos, but they are very helpful to demonstrate how the Yoga 13 keyboard is removed. By watching the video and also reviewing some of the photos on this site [make sure to click and then view the ‘full size’ photo option], you should have a pretty good view and understanding regarding Yoga 13 RAM upgrading 🙂


Holy-cow I could not figure out how to remove that stinking keyboard & upgrade the memory chip to bigger size until I found your tutorial on google. You did a good job and I got memory installed because of it. Thanks & good karma to you dude.
Hi Samuel,
Thank you for your nice comment. I am very glad you were able to use my guide to upgrade your Yoga 13’s memory!
Best regards and enjoy your nice machine,
-J.D.
You have noted some very interesting points about the Yoga RAM, appreciate it for the post and I plan on doing the memory upgrade in the near time future.
Hi YU,
Thank you for your comment and I hope your Lenovo Yoga memory upgrade goes smoothly. More RAM is always better 😉
Best regards,
-J.D.