Flush DNS cache in Windows 10 [solved]
Windows 10 is a wonderful OS, right up there with Windows 7 and one of my favorites. Thankfully, most of the classic commands still work on Windows 10 too 🙂
Here are the steps for flushing the Windows DNS cache in Windows 10:
#1 Open Command Prompt (Administrator account is not required)
#2 Type: ipconfig /flushdns
#3 Press Enter
Successfully flushed the DNS Resolver Cache
Voila, your DNS cache should be flushed! Now you can get a fresh resolution of IPs for any domain names you are trying to visit 🙂
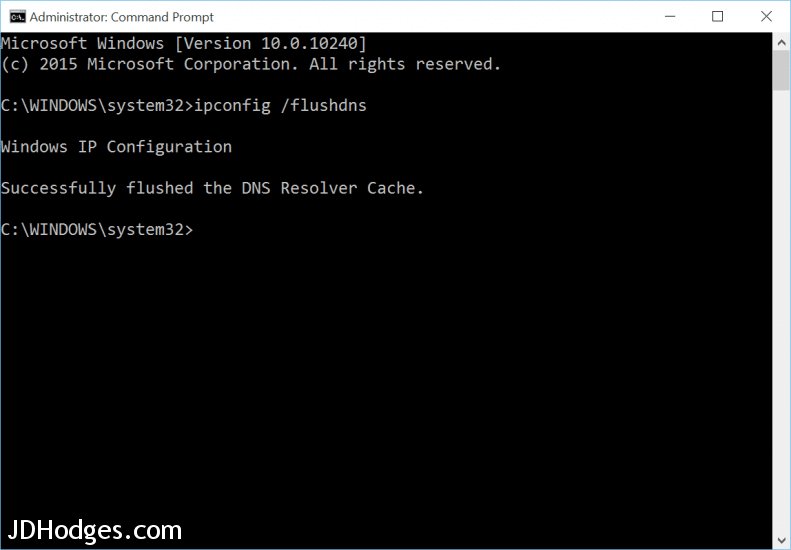
PS here is a transcript of an example Windows 10 command prompt session, flushing the cache:
C:\WINDOWS\system32>ipconfig /flushdns

Windows IP Configuration

Successfully flushed the DNS Resolver Cache.

C:\WINDOWS\system32>
Top Search Terms:
- flush dns windows 10 (121)
- ipconfig flushdns windows 10 (77)
- flush dns cache windows 10 (32)
- ipconfig /flushdns windows 10 (18)
- dns flush windows 10 (18)
- windows 10 flush dns (17)
- windows 10 flush dns cache (13)
- clear dns cache windows 10 (11)
- flush dns on windows 10 (10)
- ipconfig /flushdns win 10 (8)
This resolved my issue for me, now I can show my client the new site immediately. THANK YOU!
-EA
Hi EA,
Thank you for your nice comment. I am very glad that the DNS flush tip helped 🙂
Best regards,
-J.D.
I used your exact instructions but win 10 says cannot find (flushing dns as instructed to ensure that edge is able to work correctly as it is very slow altogether) I am not in the least technologically capable as am elderly. Ant help via email would be greatly appreciated, Mike
PS can you tell me how to put an icon on my desktop so I can access your excellent site in the future?
Hey Mike, the “cannot find” message usually means the command prompt couldn’t find the ipconfig command, which sometimes happens if you just type it in the wrong window. Make sure you opened Command Prompt (search for “cmd” in the Start menu), and then type exactly: ipconfig /flushdns and press Enter. As for putting a shortcut to the site on your desktop: in Edge or Chrome, click the three-dot menu in the top right corner, then look for “More tools” and “Create shortcut” or “Add to desktop.” That should do it!
very nice and easy fix, saves me of frustration,
thank you very much.
sam
My pleasure sam!! Thank you for taking the time to comment 🙂