How to Enable Wake-on-LAN (WoL) on a Synology NAS (DS925+ and Others)
TL;DR: On a Synology NAS, enabling Wake-on-LAN takes two steps in two different DSM screens. Turn on Enable WOL on LAN 1 in Control Panel > Hardware & Power > General, then get the NAS MAC address from Control Panel > Info Center > Network, not from Network > Network Interface.
Why Wake-on-LAN for your NAS?
Wake-on-LAN, or WoL, lets you wake a powered-down device by sending a small network broadcast called a magic packet.
I wanted it on my DS925+ so I could leave the NAS off when I was not using it, then wake it from another machine without walking over to the shelf or to turn it on from across the country via VPN.
NOTE: If you are still getting your NAS onto the network, my earlier guide on finding a new Synology NAS IP address with DHCP should save you a few minutes.
I have also been using Synology gear for a long time now. My old DS1813+ review is still floating around as proof. 😉
How to Enable Wake-on-LAN in DSM
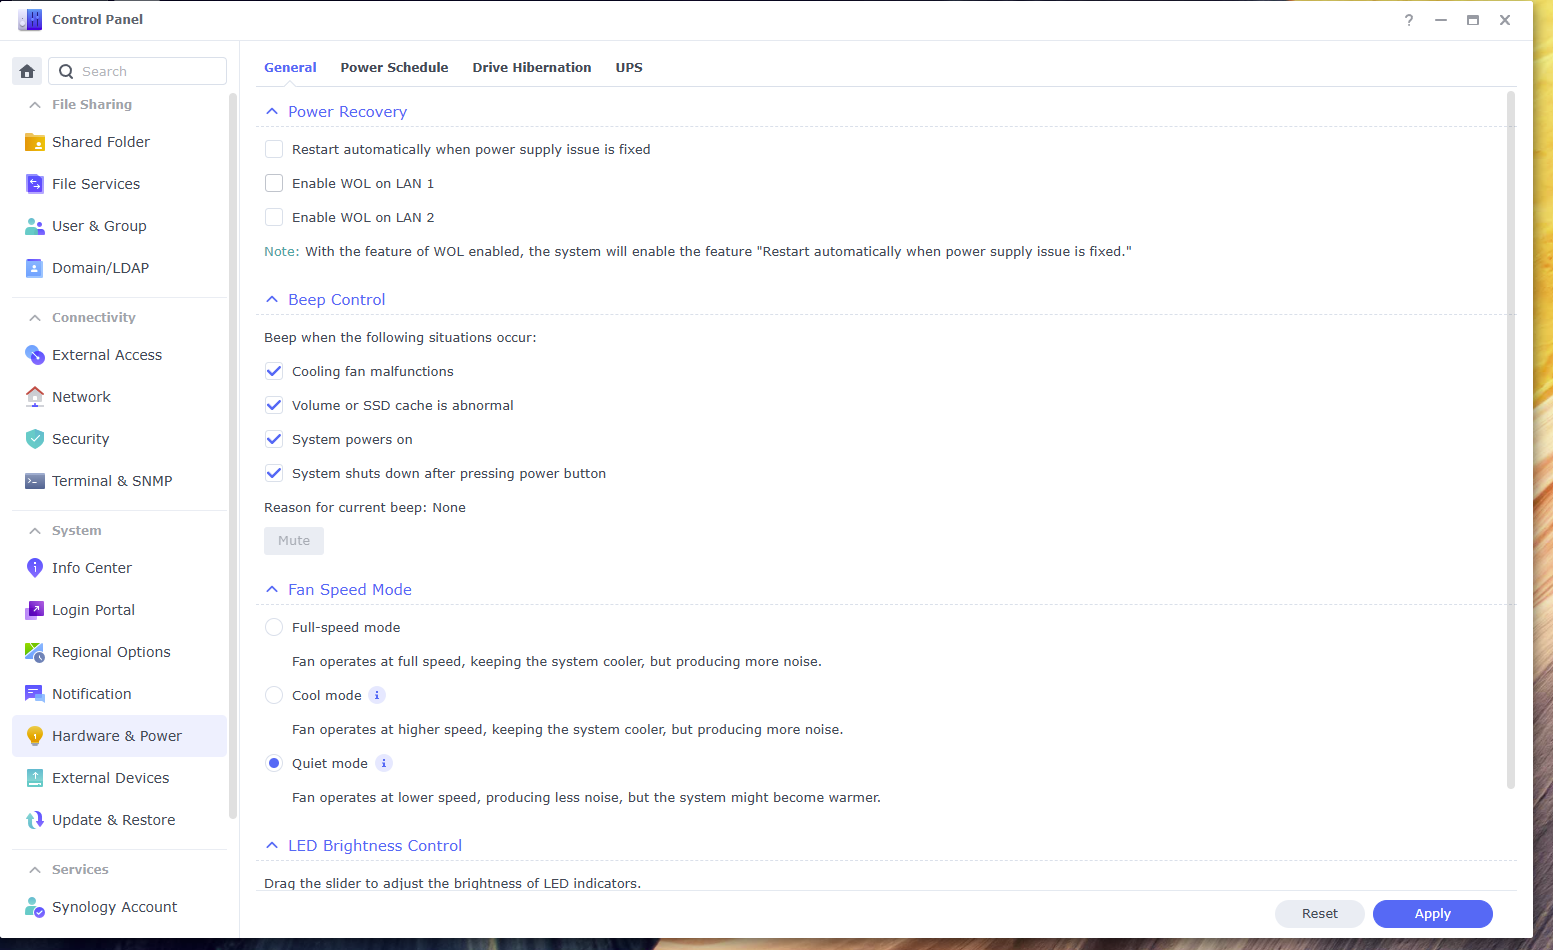
Step 1: Turn On WoL in Hardware & Power
In DSM, go to Control Panel > Hardware & Power > General.
On my DS925+, the option I needed was Enable WOL on LAN 1.
If your NAS is using a different port, use the matching interface instead.
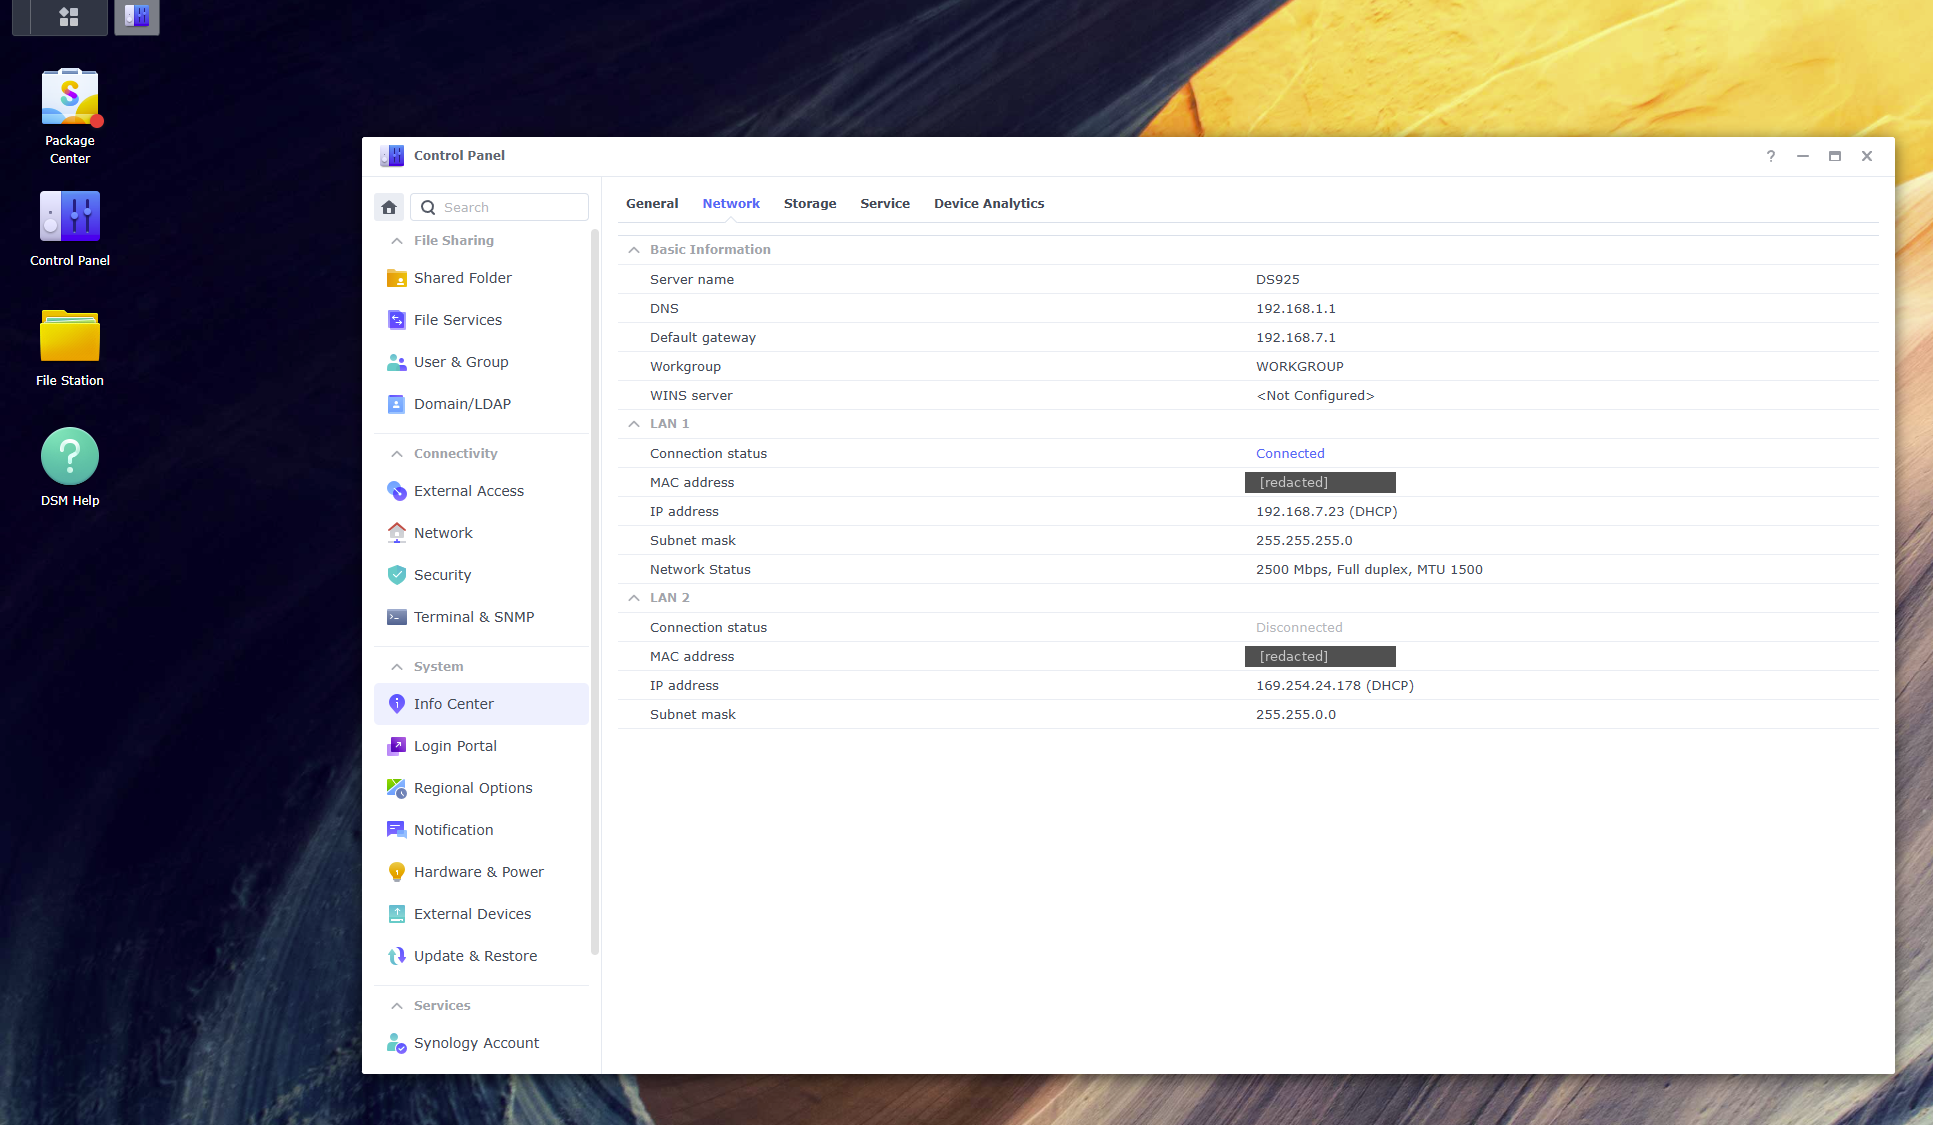
Step 2: Find Your MAC Address (It’s Not Necessarily Where You Would Think)
You need the NAS MAC address because the magic packet targets the network interface, not the current IP address.
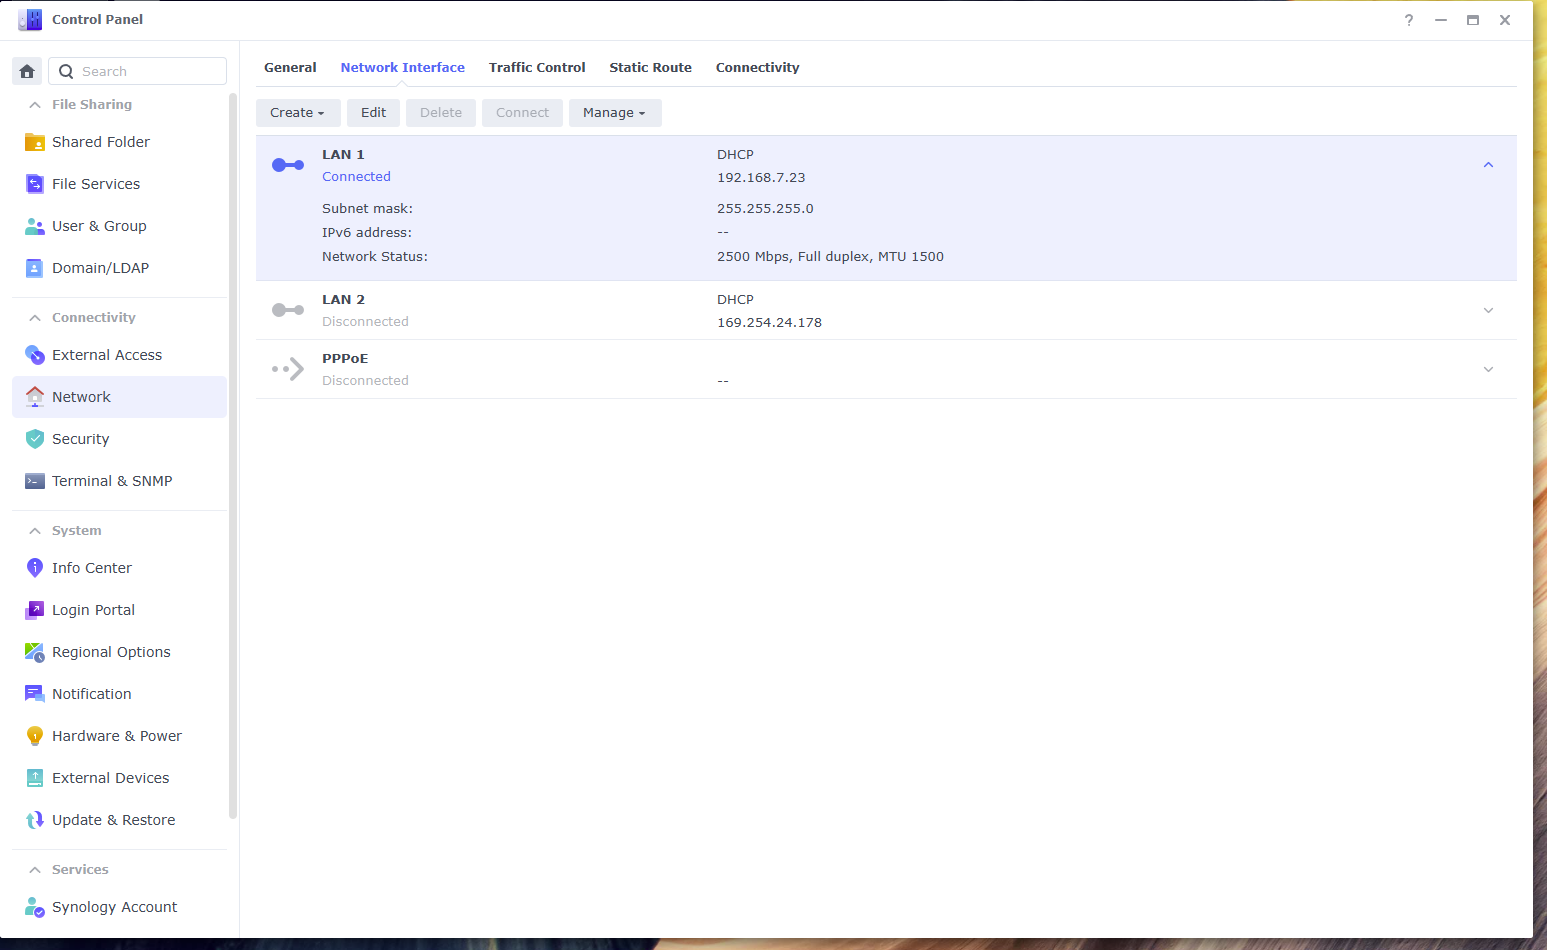
The obvious place to look is Control Panel > Network > Network Interface.
That screen mostly shows interface status and IP details, which is exactly why I first assumed the MAC address would be there too.
The screen that actually gave me the MAC address was Control Panel > Info Center > Network.
That is where DSM showed the LAN MAC addresses clearly enough to copy.
Step 3: Send the Magic Packet
Once WoL is enabled and you have the right MAC address, you can wake the NAS from another device on the same local network.
The basic idea is simple: send a magic packet to the NAS interface you enabled for WoL.
These are the tools I would start with:
- Windows: Wake on LAN from the Microsoft Store (or myriad other options)
- Mac:
wakeonlanvia Homebrew - Linux:
wakeonlanoretherwake - iPhone / Android: Magic Packet or a similar WoL app
On Mac or Linux, the command looks like this:
wakeonlan AA:BB:CC:DD:EE:FFIf nothing happens, double-check that you copied the MAC for the correct Synology interface and not just the current IP information from the network panel.
Things to Know Before You Rely on WoL
WoL is simple once it is working, but there are a few caveats worth knowing up front.
Wake-on-LAN usually only works if the NAS was shut down normally, the power cable stayed connected, and the device sending the packet is on the same LAN or broadcast domain. If the NAS lost power completely, if you are trying to wake it across routed networks or VLANs, or if you are using link aggregation, results can get inconsistent fast.
I would also test WoL a few times before depending on it remotely.
If your Synology is powered on but suddenly unreachable from Windows after an update, that is a different problem. I wrote up that specific issue here: Synology not accessible after a Windows upgrade.
A Quick Note on 2.5GbE Switches
The DS925+ has 2.5GbE ports, so a 2.5GbE switch lets you actually use the faster networking Synology built into it.
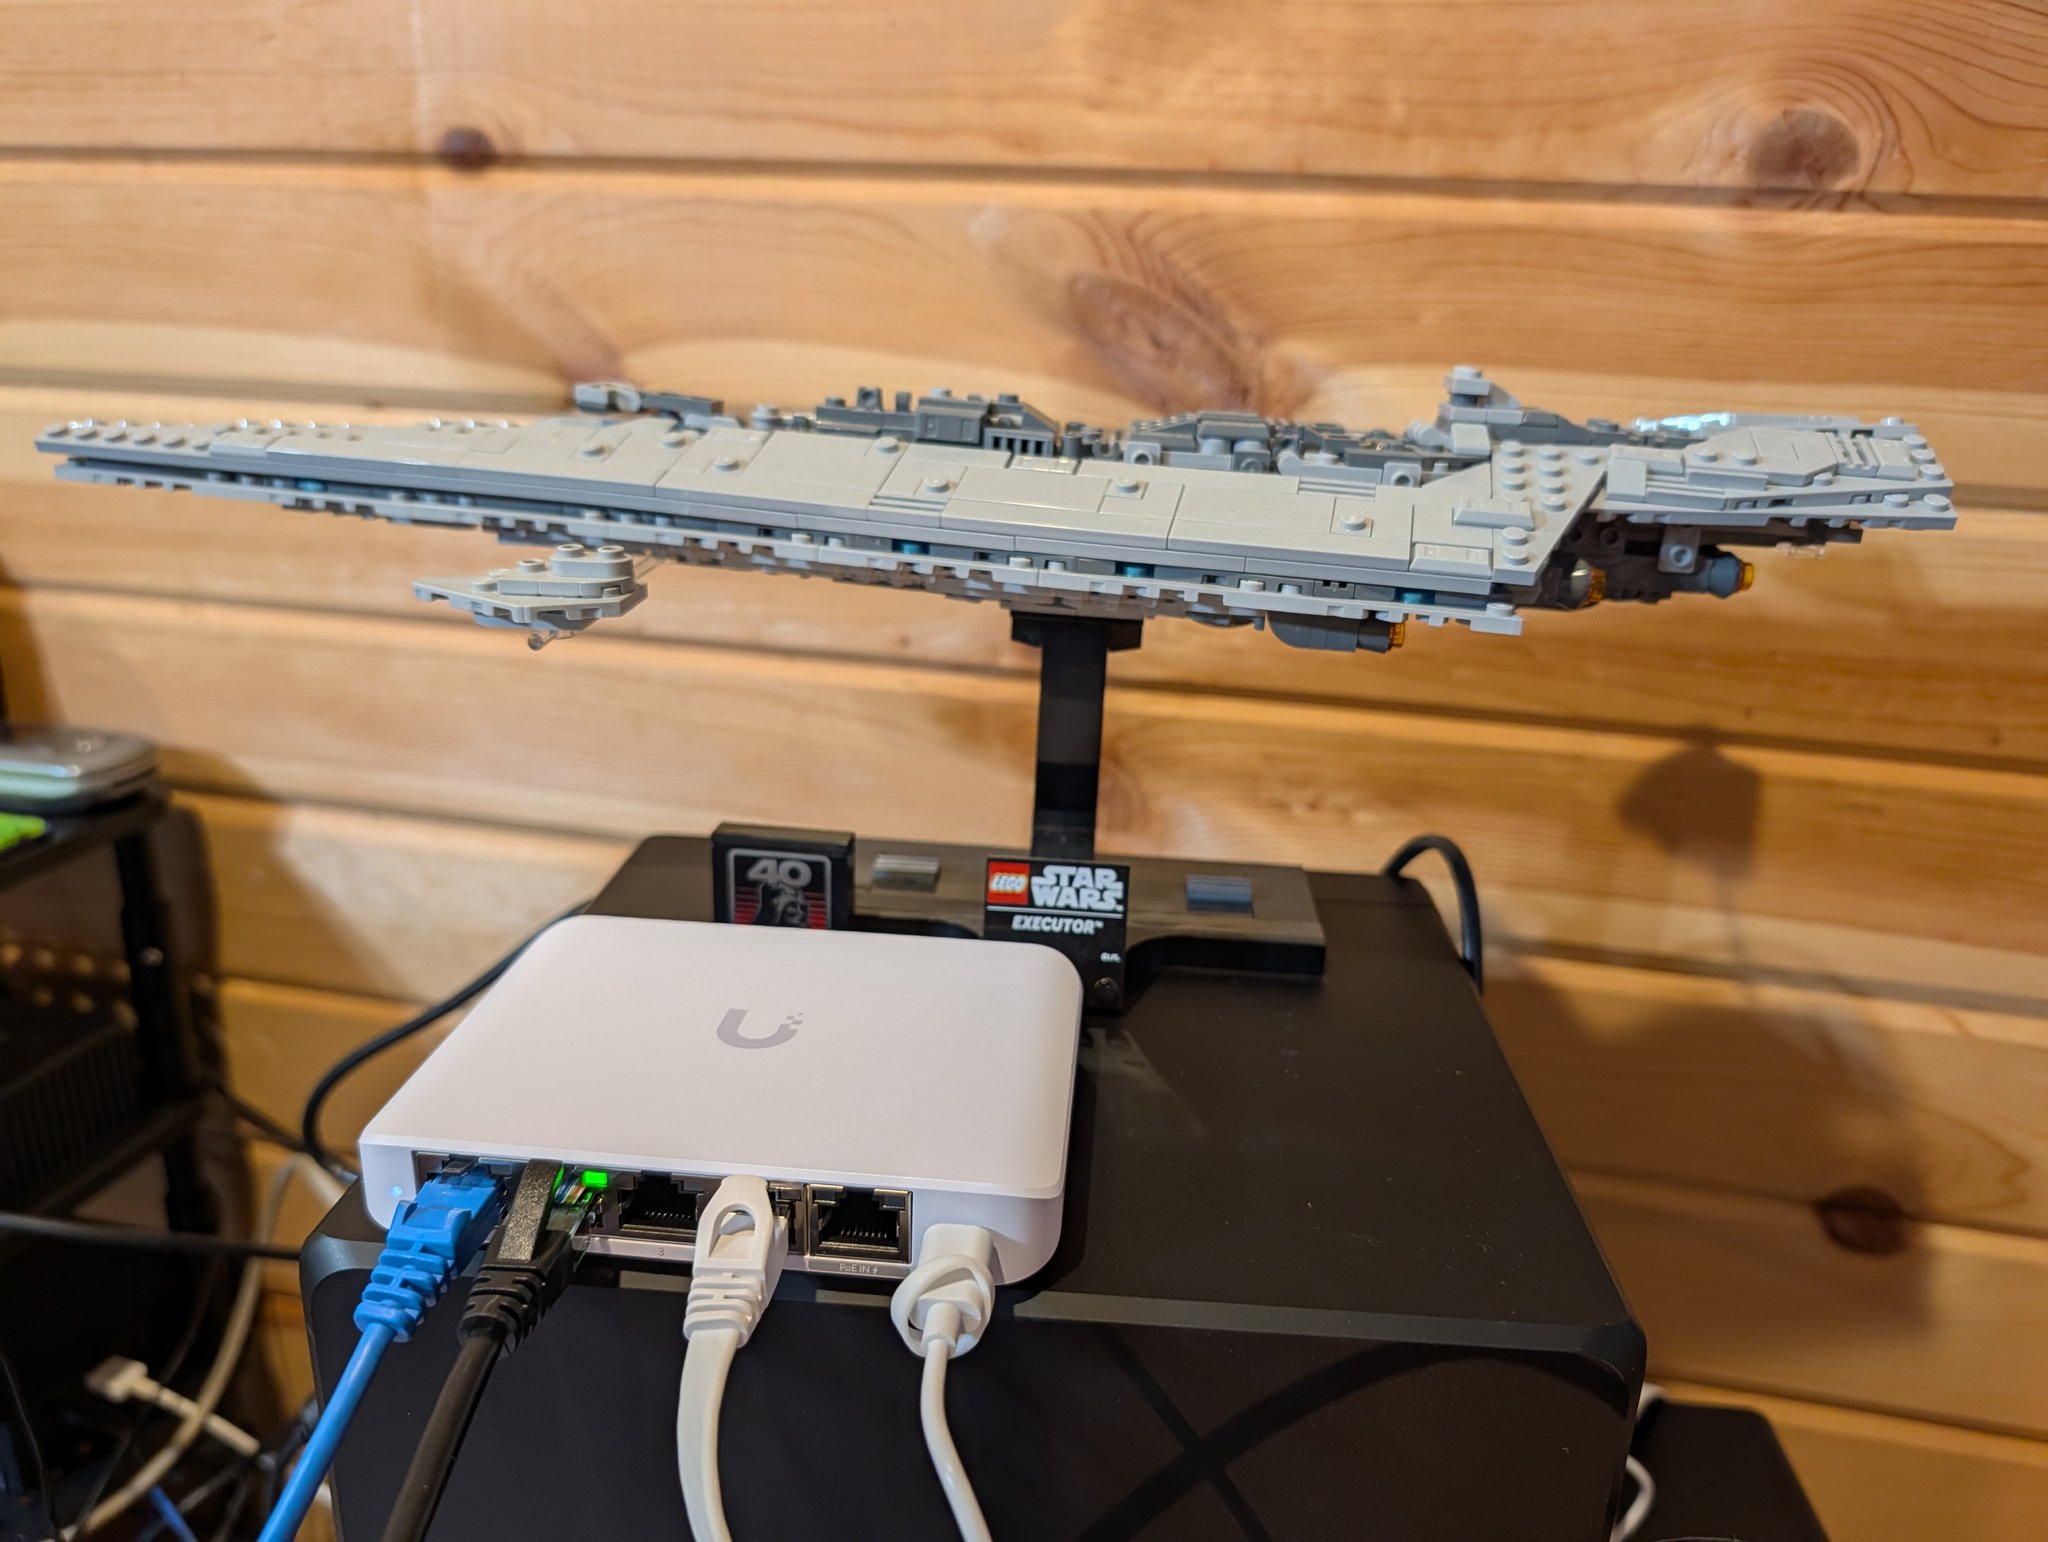
I have mine connected to a Ubiquiti USW-Flex-2.5G-5 (fanless, compact, and happy on USB-C or PoE). That is not required for WoL, obviously, but it is a nice match for the DS925+ if you want full 2.5GbE speed. Speeds are FANTASTIC if you have SSDs in your Synology NAS 💪.
I use the Ubiquiti USW-Flex-2.5G-5 with my DS925+. It is a 5-port 2.5GbE switch that is fanless and can run from USB-C or PoE, which makes it an easy fit for a small NAS setup.
Bottom Line
The checkbox is only half the job.
The real gotcha is that the MAC address you need for Wake-on-LAN is in Info Center > Network, not in Network > Network Interface.
That is what worked for me on a Synology DS925+ running DSM 7.2, and it should be broadly applicable to other recent Synology NAS models too.
Some links in this post are affiliate links. If you buy something through one of these links, I may earn a small commission at no extra cost to you. I only recommend products I’ve personally used or thoroughly researched.✅
Information in this post was accurate at the time of writing. Software updates, product revisions, and policy changes happen. If something here doesn’t match what you’re seeing, drop a comment and I’ll update the post.